Install CakePHP 3.x using Composer

Well in my previous articles I have explained how to install CakePHP 3.x using source files from git which requires to download files of CakePHP and uploading them to local server which requires lots of efforts in moving files from one location to other. There is second method also to install CakePHP at your local server machine and that is using “composer”. Composer is a dependency management tool which CakePHP uses as the official method of installation.
Installation of Composer on Linux and Mac operating system
Step 1. Run the installer script as described in the official Composer documentation (https://getcomposer.org/download/) and follow the instructions to install Composer.
OR
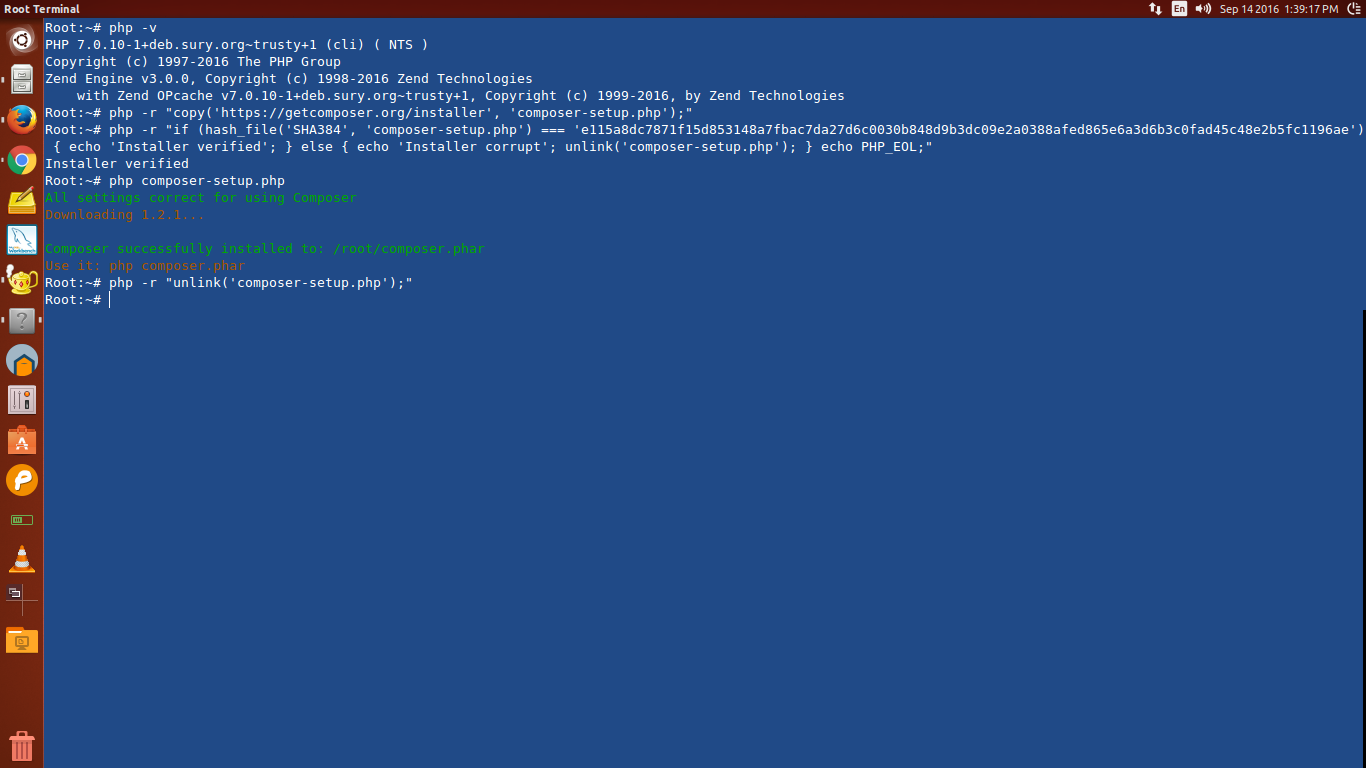
Run following commands to install composer in your system:
//Download the installer to current directory
php -r "copy('https://getcomposer.org/installer', 'composer-setup.php');"

//Verify the installer SHA-384
php -r "if (hash_file('SHA384', 'composer-setup.php') === 'e115a8dc7871f15d853148a7fbac7da27d6c0030b848d9b3dc09e2a0388afed865e6a3d6b3c0fad45c48e2b5fc1196ae') { echo 'Installer verified'; } else { echo 'Installer corrupt'; unlink('composer-setup.php'); } echo PHP_EOL;"

//Run Installer
php composer-setup.php

//Remove Installer
php -r "unlink('composer-setup.php');"
Composer Installation
Step 2. Execute the following command to move the “composer.phar” to a directory that is in your path:
mv composer.phar /usr/local/bin/composer
Installation of Composer on Windows operating system
Step 1. To install the composer for windows operating system, you can download the installer file from GIT at the link : https://github.com/composer/windows-setup/releases/
Step 2. The instructions to setup composer on Windows operating system can be found here at the link : https://github.com/composer/windows-setup
Now, as you have downloaded the composer on your respective systems. So now it’s a turn to verify the installation of composer. For that just open the terminal and type “composer” and hit enter. This should show you the composer details as an output. If not then there is something wrong with the composer installation and you need to again set up composer from starting.
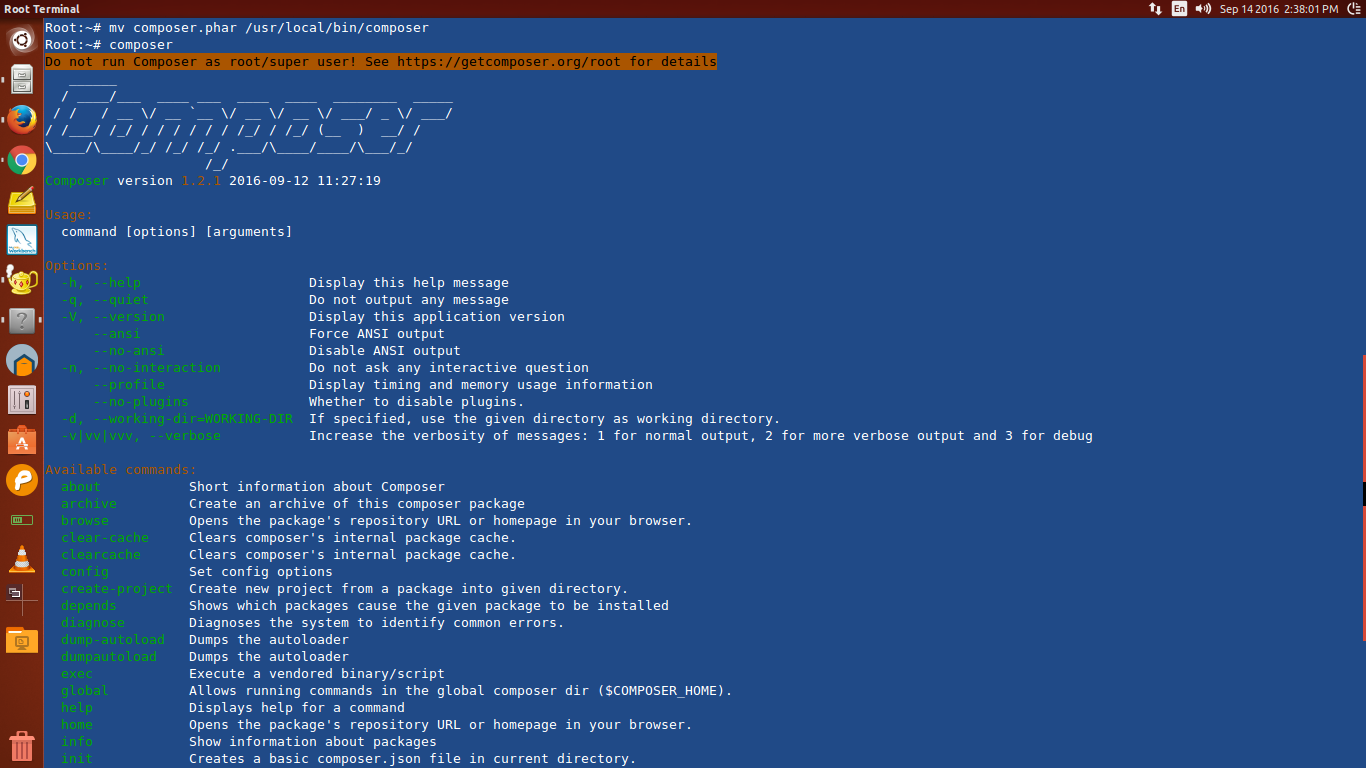
Composer Check
Note: Before starting creating a project, make sure that the composer is installed globally.
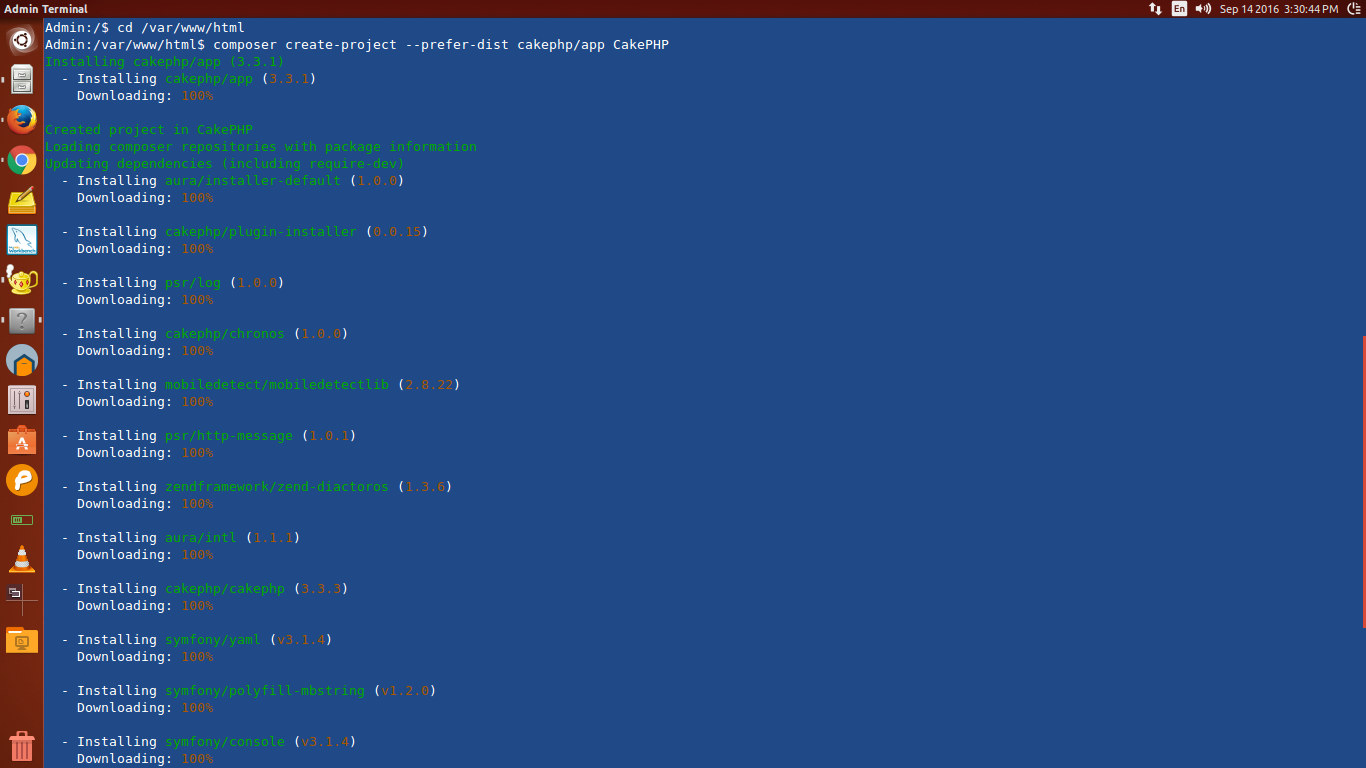
Create a CakePHP Project using composer
Step 1. Open the terminal window and change your directory to the directory where you want to install CakePHP. In our case the path is: “/var/www/html/” so the command would be:
cd /var/www/html;
Step 2. Run the below mentioned command in your terminal area which will start installation of CakePHP at your local machine.
composer create-project --prefer-dist cakephp/app my_app_name;
CakePHP Installation
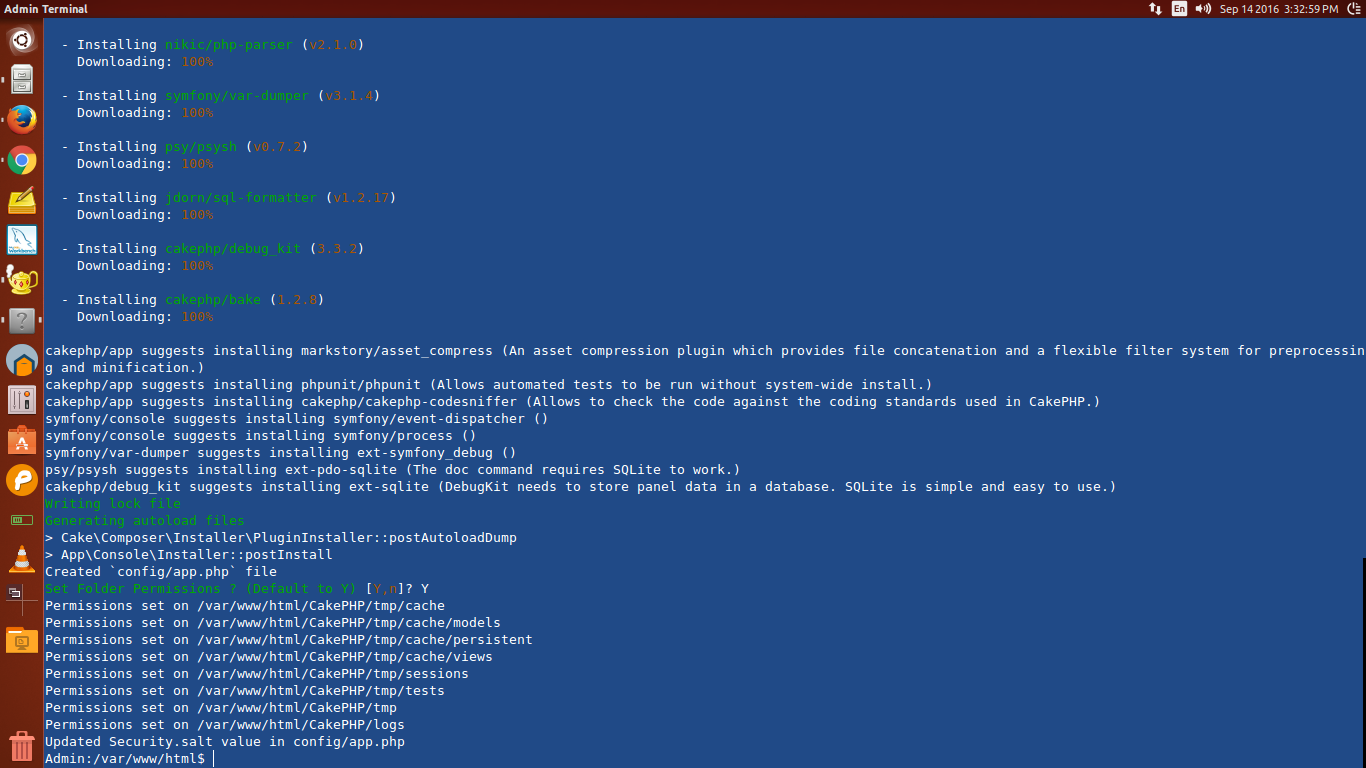
Step 3. Before the completion of the installation, it will ask you “Set Folder Permissions ? (Default to Y) [Y,n]?”. Write “Y” and hit enter which will complete the CakePHP installation.
CakePHP Installation Complete
Step 4: Open browser window and type “localhost/CakePHP_Project” to run the application. As you have not configured the Database yet so the output will look like as below –

CakePHP 3.x Installation output without databse
Step 5: Open “localhost/phpmyadmin” in browser, create database with a name “cakephp”.
Step 6: For database configuration with CakePHP 3.x, open up “CakePHP_Project/config/app.php” file and replace the values in the Datasources.default array with database details. After changes configuration array might look like as below –
'Datasources' => [
        'default' => [
            'className' => 'Cake\Database\Connection',
            'driver' => 'Cake\Database\Driver\Mysql',
            'persistent' => false,
            'host' => 'localhost',
            'username' => 'root',
            'password' => '',
            'database' => 'cakephp',
            'encoding' => 'utf8',
            'timezone' => 'UTC',
            'cacheMetadata' => true,
            'log' => false,
            'quoteIdentifiers' => false,
        ],
 ]
Step 7: Finally Run the application URL (http://localhost/CakePHP_Project/) at the browser, screen would look like the below.

CakePHP 3.x Installation output with databse