How to upload an iOS App on Apple App Store?
Upload App on Apple App Store
To submit an application on apple app store, firstly you need to have a developer account on apple developer along with $99 as a fee for that (If you want to submit an application on apple app store) which you will pay using credit card. Link for the membership at apple developer program is: https://developer.apple.com/support/compare-memberships/
To develop iPhone application you must need to have mac operating system with xcode (an application development software for mac) installed into it.
- Sign In to the apple developer account and to be able to submit applications on apple app store you must need to enroll in apple’s developer program which will cost you around 99$.
- Enrollment page will ask you to get enrolled as an individual or as a company. After selecting your selection just fill up your billing information and accept the terms and conditions. Complete process to generate your apple developer ID.
- Sign In to your new IOS developer’s account which will have now a lot of new features like programming guides, downloadable code, documentations, videos & many more, which will help you out to develope your skills to next level.
- You need to focus on the Certificates, IDs & Profiles area and iTunes Connect while developing your applications.
- Most important requirement for an app to get run on an apple device is to be non-jailbroken which means that the device firmware should not be modified at all.
- Certificates: Apps installed from official apple’s app store comes with bundled certificates with the application which apple device will check by validating the signatures before launching the application whether the application which is getting executing on device is valid or not. If there is no signature or if the signatures are not valid, then the device will not allow the app to run.
- As a developer, you need to be able to install and run an application on your device as well because you are the developer of the application and you need to have a way create and sign your own certificates.
- Profiles (Code signing Identities) are the files which allow your application on xcode in a same way as the application will get allowed on a apple device as valid.
- There are 2 types of profiles are there –
Development profile
This will allow the application to run on specific devices
Distribution profile
This will get used to sign your application first before you submit it to apple store for approval. You can not use these profiles to install app on any devices because apple will gain use this to sign your application. Signing process ensures that the application which the user is installing is from a trusted source.
- iTunes Connect –
This is the portal where you’ll submit your application along with the description, screenshots, price, and other information.
- Certificates –
Certificates can be generated using your developers account. You need to generate both the certificates i.e. developer & distribution certificate.
- Click on Certificates, Identifiers & Profiles
- Make sure the drop down in the upper left says iOS, tvOS, watchOS
- On the next page select the iOS app development and click on “continue”.
- Open Keychain access app on your Mac OS system
- Once the program is open, choose “Keychain Access\Certificate Assistant\Request a Certificate From a Certificate Authority”
- Fill up the details and save the certificate on your disk by clicking on “continue”.
- Go back to developer center and click “continue”.
- In the next window, click choose file to choose file which you have downloaded earlier on your disk and click “continue”.
- You will get the new screen which will say that your certificate is ready to download.
- Click Add in in the Keychain Access dialog to complete the installation.
- Similarly create the the Distribution Profile as well by clicking on “Production” menu at left hand sidebar menu item and select the “App Store and Ad Hoc” radio button.
- FInally follow the same process as that of developer profile to download the Distribution Profile certificate as well.
- Certificate names will be like: cer and ios_distribution.cer for developer and distribution profiles respectively.
- Click on “certificate” once and if there will be a green marked tick then only the certificate will be considered as valid otherwise not.
- Registering Devices –
Now the next step is to register devices, for that you need to follow below mentioned steps –
- Go to Certificates, identifiers and profiles first and then click on “Devices–>All” and at right side area click on “+” button.
- You need to have the UDID of the devices on which you want to run the app.
- Put the name of the device and UDID, then click on “continue”.
- You will be prompted to confirm. Click Register.
- Now this device will start to list out under your device list.
- Note: You can register as many devices as you want to.
- Creating Application ID
As you have successfully registered your device, now you need to create an application ID. Each & every app you create will have the dedicated App ID.
There are 2 types of App IDs –
- Explicit App IDs
Must be used to implement the services such as in-app purchases or iCloud
- WildCard App IDs
Should be used when you want to use the same App ID for multiple apps.
Steps to follow –
- Under Certificates, identifiers & profiles, go to menu “Identifiers–>App IDs”
- Click on “+” button in right side area
- Fill in the details and click “continue”.
- You will be prompted again to confirm, click “Register”.
- Provisioning Profiles –
Provisioning profile joins together all the things you have completed so far, including certificates, device identifiers, and the App ID. There are 2 types of provisioning profiles –
- Development Provisioning Profile
These are used to install versions of your application during development phase.
- Distribution Provisioning Profile
These are used to submit your applications to app store and beta testers.
Steps to follow –
- Go to Certificates, identifiers and profiles and then click on “Devices–>All” and at right side area click on “+” button.
- Choose iOS development radio button, click “continue”.
- Now the new window will ask you to select the application ID, select application ID and click “continue”.
- Select certificates and then devices followed by clicking “continue” button.
- Next window will allow you to enter the new name for this profile. Input the profile name and click on “continue”.
- At the end the final page will show the generated profile and will allow you to download that. Click “Download” button to download it.
- The screen will ask you to Add Another profile as well, So go ahead and add the distribution profile as well.
- Double click on both the profiles which you have downloaded, this will launch the xcode. Verify the profiles. Click on the Project in the left pane. Select Build Settings, select All, scroll down to Code Signing and click on the word Automatic next to the entry for Provisioning Profile.
- ITunes Connect –
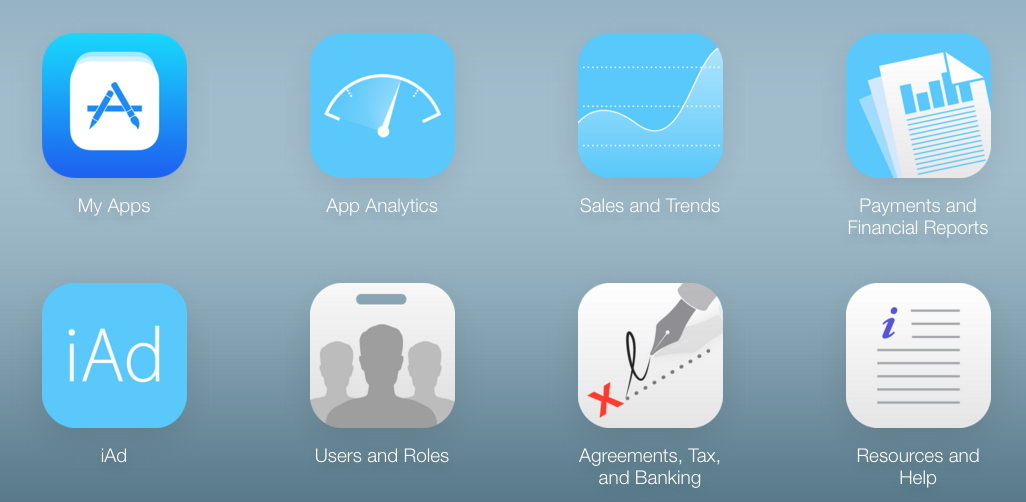
iTunes Connect is the place where you will exactly upload your application with all the details related to it. So if you are clicking on “iTunes Connect” under your account for the first time then you will get an introduction panel. So mark the checkbox as checked and click Accept. Under iTunes Connect click on “Agreement, tax, and Banking” and follow the steps to add the Agreements, tax, and banking accounts along with contact information including contracts. But if your application is a Free App then you can skip this information and can submit the app directly on iTunes Connect.
- Application Submission –
To submit an application on iTune connect you need to have the below mentioned things ready with you –
- Application Name
- Application Description
- Application Icon of size 1024×1024
- 5 inch retina: Sized: 640×920 (no status); 640×960 (fullscreen); or, for landscape, 960×600 (no status bar); or 960×640 (fullscreen).
- 4 inch retina: Sized: 640×1096 (no status); 640×1136 (full screen); or, for landscape, 1136×600 (no status); 1136×640 (fullscreen).
- 7 inch retina: Sized: 750×1334 (portrait); 1334×750 (landscape).
- 5 inch retina: Sized: 1242×2208 (portrait); 2208×1242 (landscape).
- iPad: These should be sized 1024×748 (landscape, no status); 1024×768 (landscape, full screen); 2048×1496 (landscape hi-res, no status); 2048×1536 (landscape hi-res, full screen); 768×1004 (portrait, no status bar); 768×1024 (portrait, full screen); 1536×2008 (hi-res portrait, no status bar); 1536×2048 (hi-res portrait, full screen).
- iPad Pro: Sized 2048×2732 (portrait); 2732×2048 (landscape).
- After having all these required things, click on “My Apps” followed by “+” and then “New App”.
- In the new screen you will be able to see the form where you will input all the details like: platform, name, bundle ID, SKU etc., and click “Create”.
- After creating an app, you will have a new screen which will have all the details related to an app you have recently created.
- Fill up category and privacy policy url and click on “save”.
- At left hand side menu, click on Pricing & Availability menu item to set the pricing for your application.
- Click on 1.0 Prepare for Submission, and upload your app icon as well as at-least 1 screenshot as per given screen sizes. Click on “Save”
- Scroll down and fill up the description, keywords, support & marketing urls. After this fill up “General App Information” and edit the ratings too.
- Scroll down to App Review Information. Fill all the details and leave Automatically release this version option selected and click on “Save”.
- If everything is fine with all the steps, you will be able to see the “Submit for Review” button in the top right position.
- You have to upload the app using xCode otherwise you will get the error message after hitting “Submit for review”.
- Go to Xcode and choose Generic iOS Device in the scheme chooser.
- Sign In to your account on xCode, go to Product → Archive.
- Click on “Upload to app store”, Select iOS developer credentials and hit “Choose”
- Now you will be asked to upload an app. Click on “Upload”
- Once done with the upload, you will get an success message. Click on “Done”
- Select “Build” and finally click on “Submit for Review”.